Installing the Camera and Hardware
This guide will help you select the right location and properly install your Kingdom Metrics attendance-capture camera.
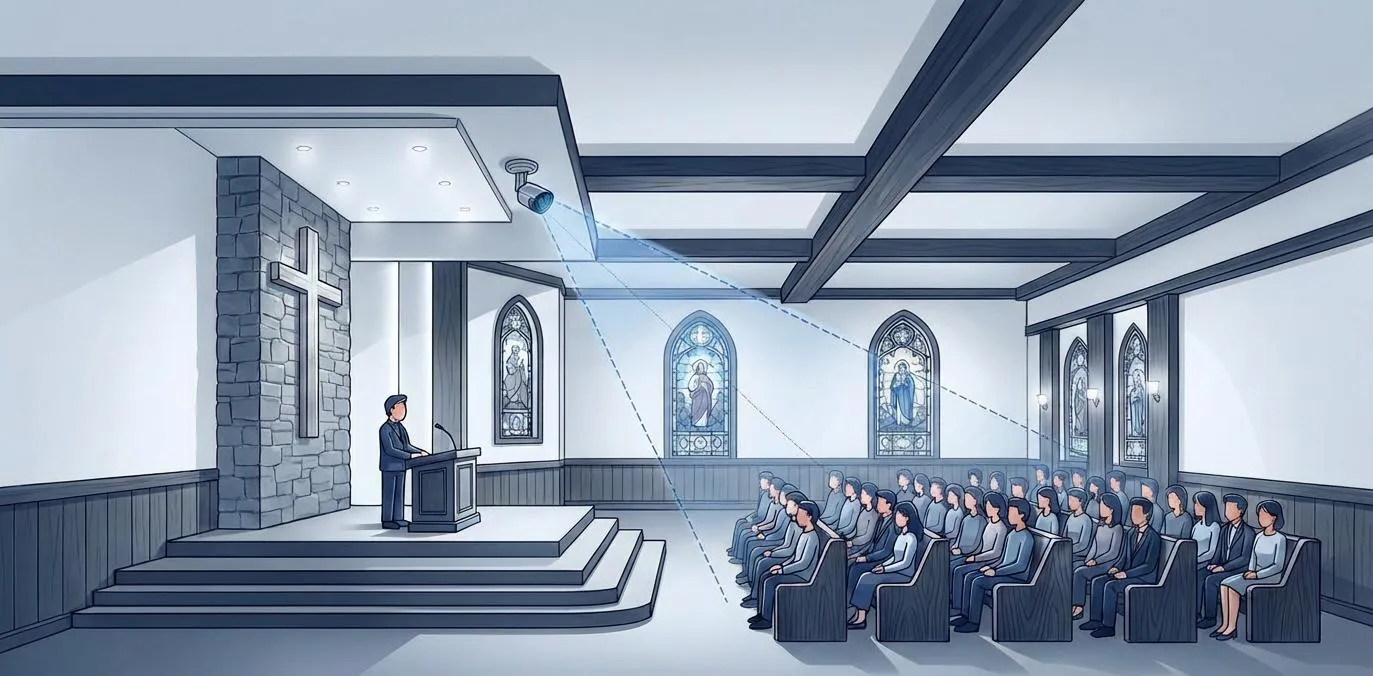
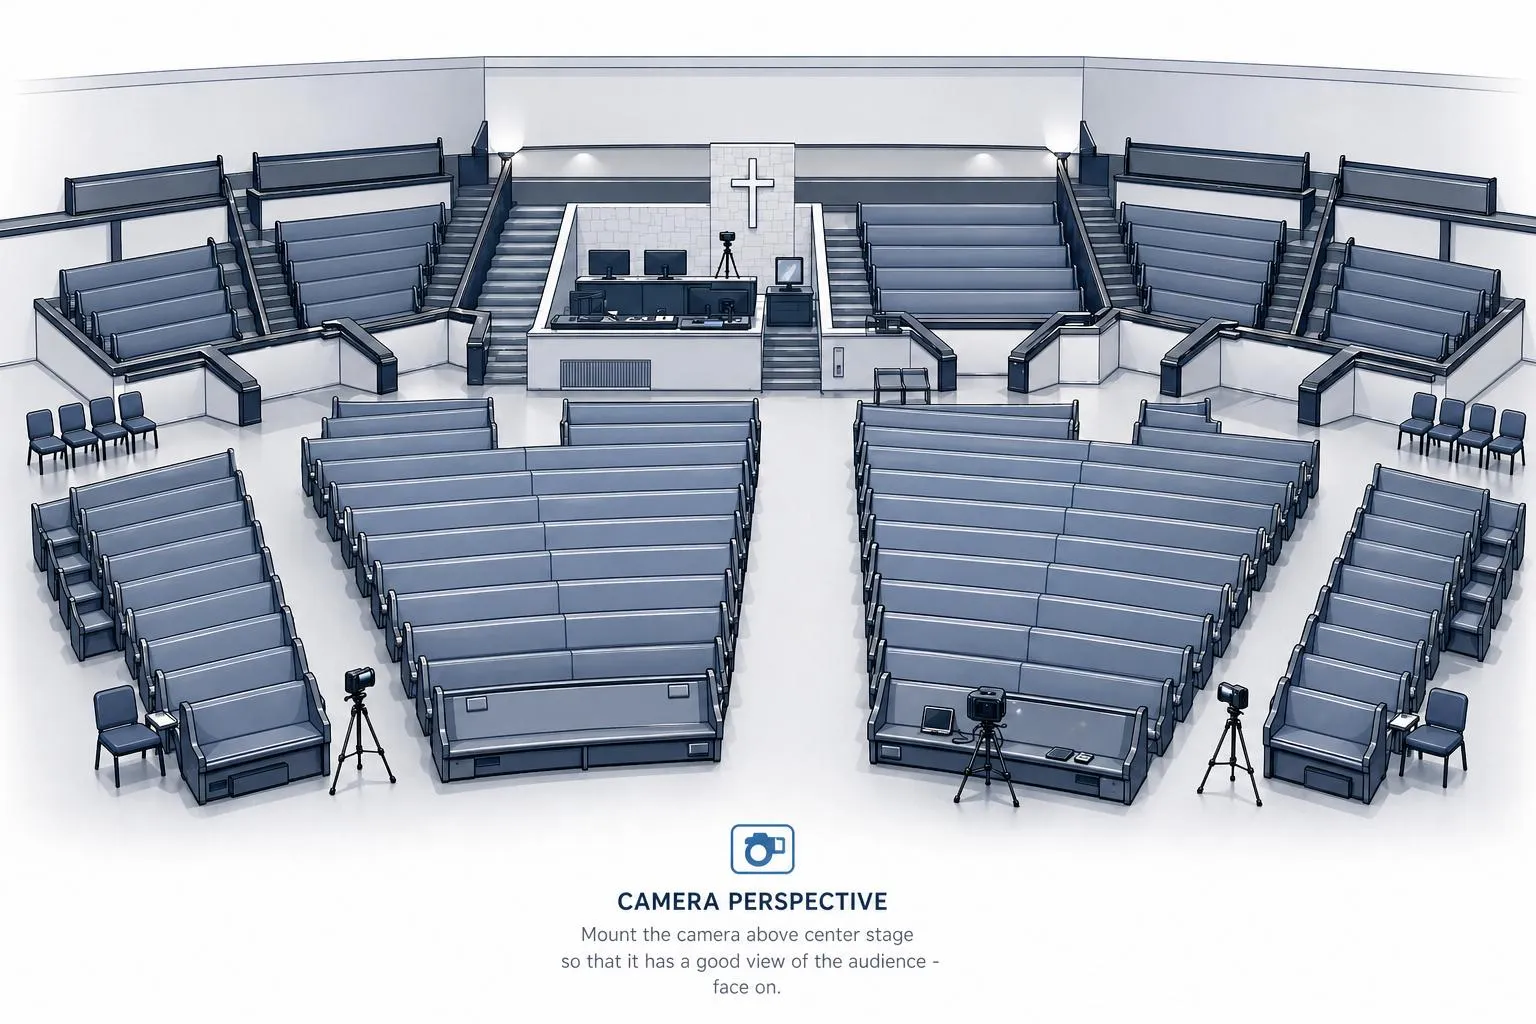
⚠️ Important: The camera has a 180° horizontal and 55° vertical field of view. Proper placement ensures optimal coverage of your auditorium.
Option 1: Using Lighting Truss
Step 1: Determine the Location
- The ideal location is above center stage on a lighting truss facing the audience.
- Make sure the camera has a clear, unobstructed view of the seating area.
- Maintain awareness of the 180° × 55° coverage for optimal accuracy.
Step 2: Attach the Camera
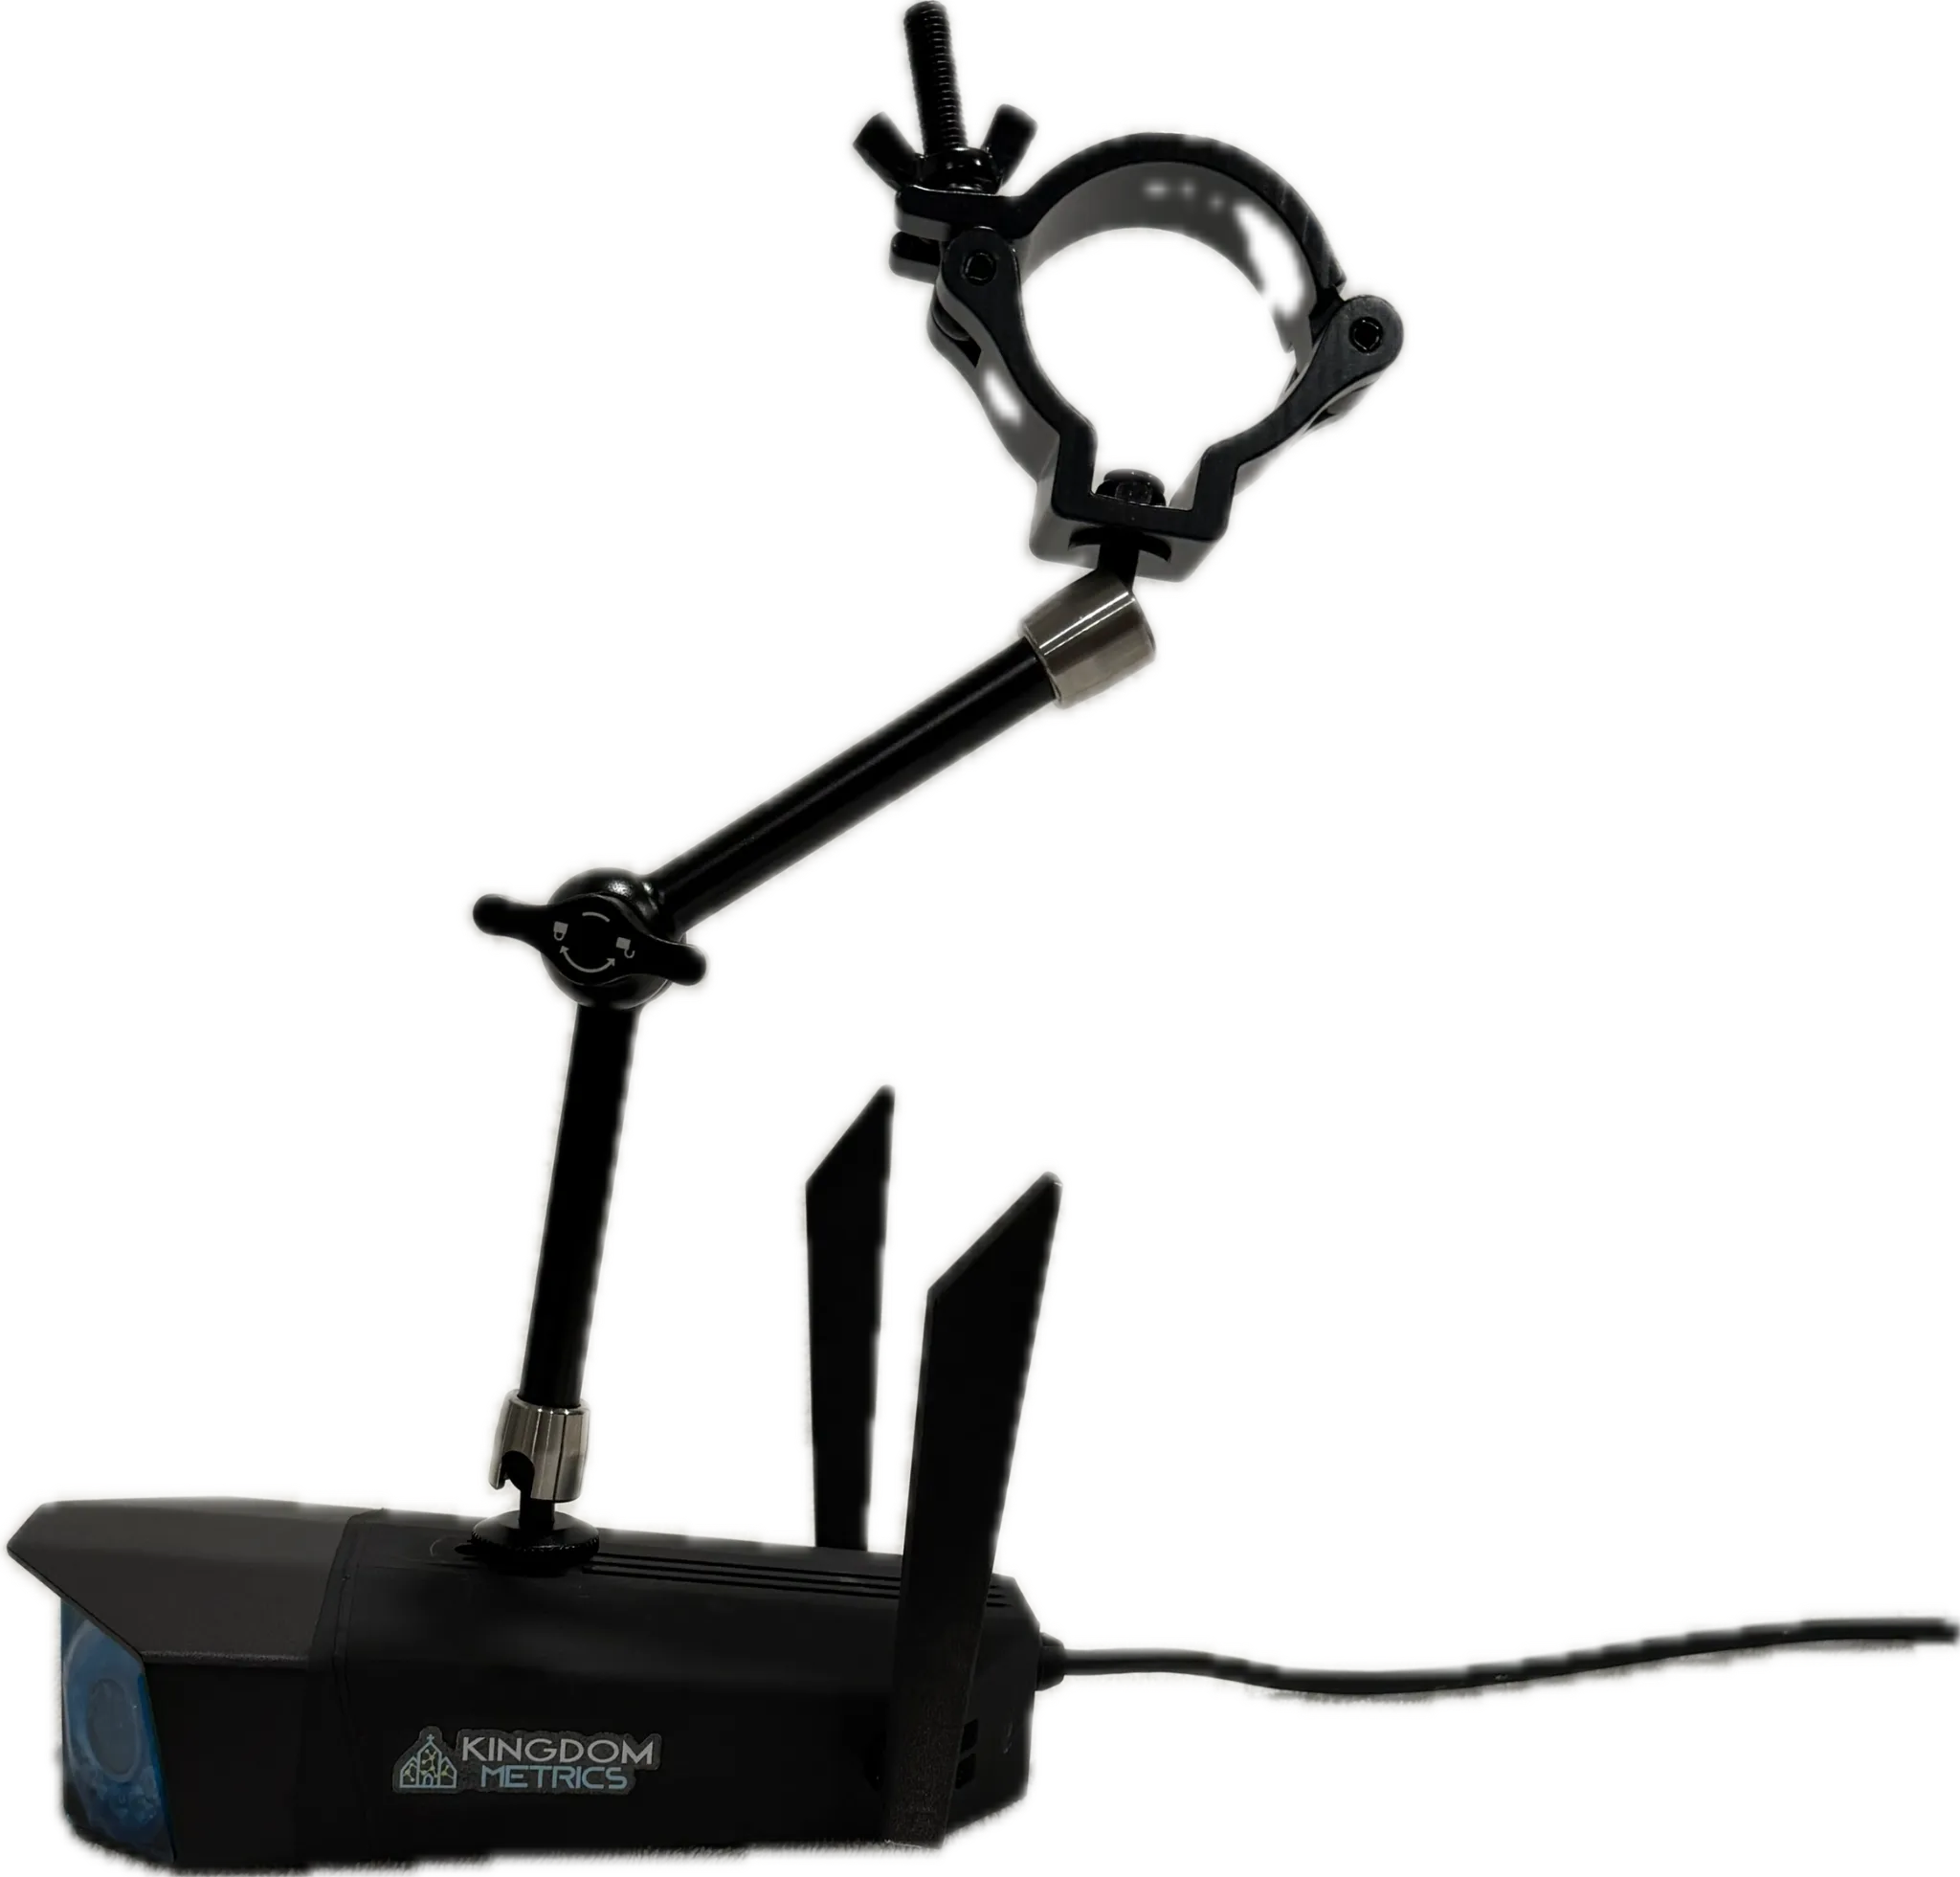
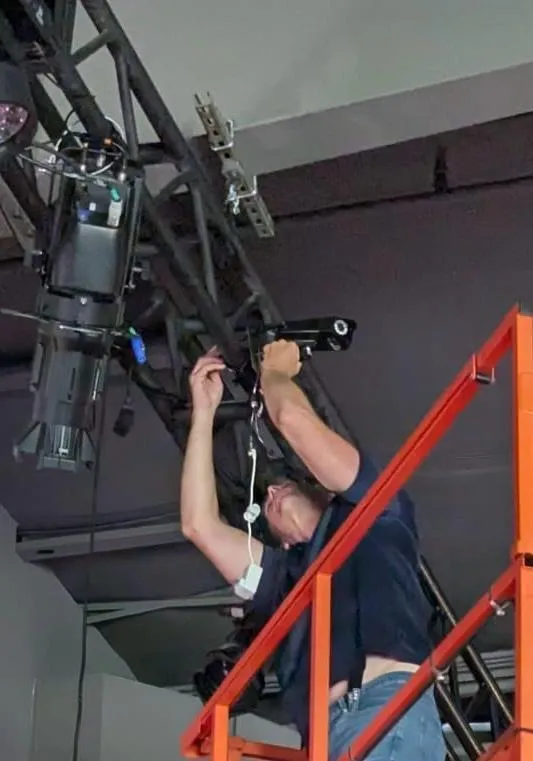
- Attach the camera to the included truss arm. Note the arm can be attached to the top or bottom of the camera.
- Use the truss clamp of the truss arm to securely attach the camera to the truss.
- Unlock the arm and position the camera to have the best view of the audience.
- The truss arm is fully articulated and can be locked into any position.
-
Confirm that the camera is:
- Facing straight toward the audience
- Firmly secured with no wobble or tilt
- Clear of obstructions such as speakers, fans, lighting fixtures, etc.
- See images A & B below
Step 3: Plug in the Camera
- If you have a WiFi camera, attach the provided antenna "ears" to the left and right sides of the camera, then power it on with the provided power supply.
- If you have a PoE camera, simply plug the camera into your PoE-powered switch with an Ethernet cable.
- Once powered on, our system will discover and provision the camera — this can take up to 15 minutes. When provisioning completes, the floodlight on the front of the camera will come on and stay on for the next 72 hours or until our team approves placement. This is intentional — it's the visual cue that the camera has been paired to your account.
Step 4: Schedule an Installation Window
- Contact [email protected] with your planned installation time.
-
During the scheduled time, Kingdom Metrics will remotely access the camera to:
- Review placement and viewing angle
- Confirm coverage of the auditorium
- Provide feedback if repositioning is needed
Option 2: Using Wall Mount
Step 1: Determine the Location
- The ideal location is on the back wall of the stage, typically centered.
- Side-wall mounting is also acceptable if the view of the audience remains clear.
- Maintain awareness of the 180° × 55° coverage for optimal accuracy.
Step 2: Attach the Camera
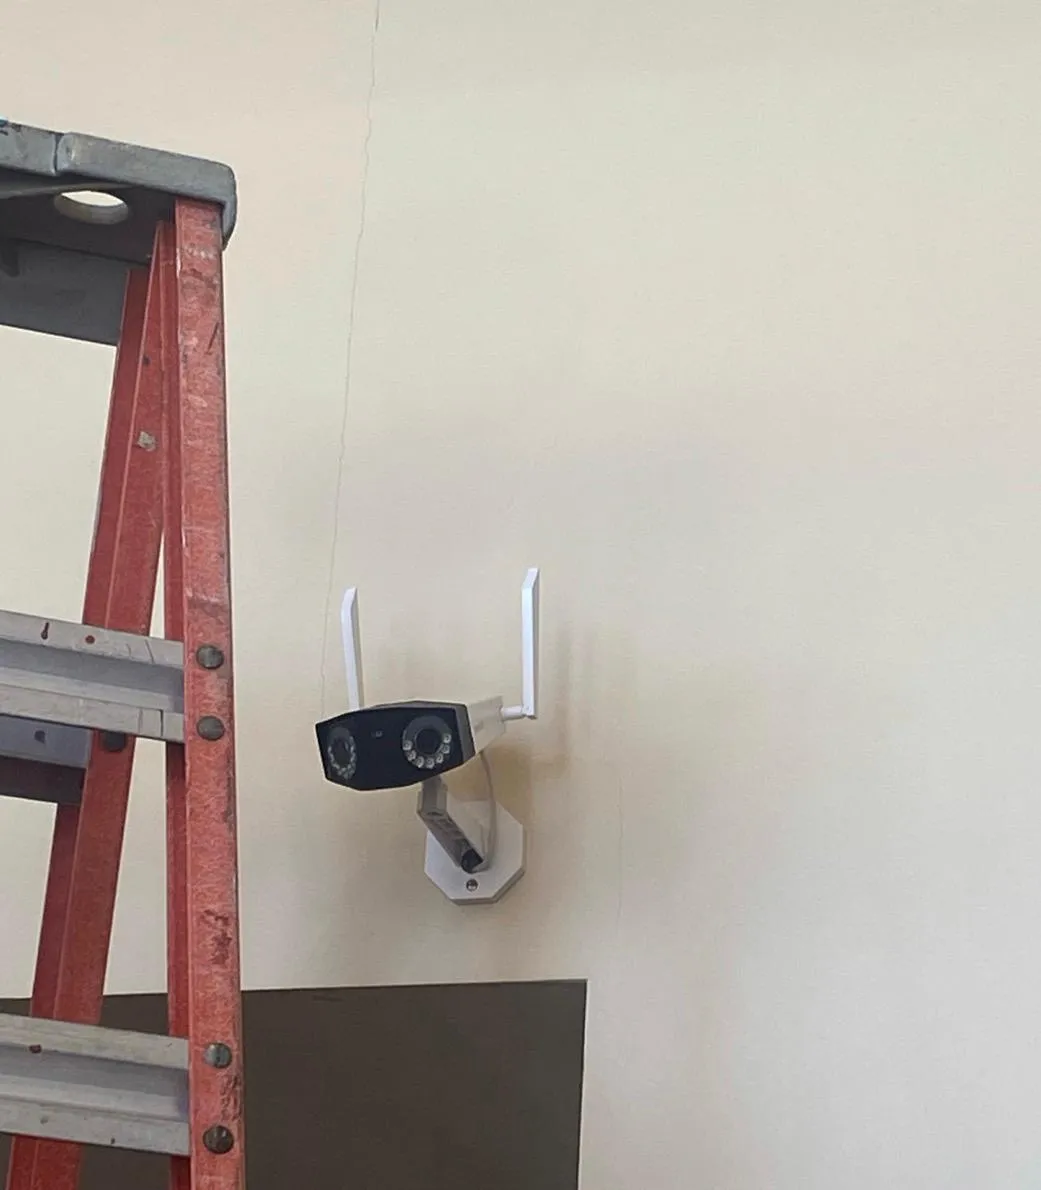
- Using the hardware provided, attach the silver camera mounting plate to the wall.
- Two drywall anchors and screws are provided for installation.
- Make sure the bracket is level and securely fastened.
- Attach the camera arm to the camera mounting plate and use the small screw to secure the arm to the plate.
- Attach the camera to the camera arm.
- Position the camera as best you can to have the best view of the audience.
-
Confirm that the camera is:
- Facing straight toward the audience
- Firmly secured with no wobble or tilt
- Clear of obstructions such as speakers, signs, etc.
- See images A & B below
Step 3: Plug in the Camera
- If you have a WiFi camera, attach the provided antenna "ears" to the left and right sides of the camera, then power it on with the provided power supply.
- If you have a PoE camera, simply plug the camera into your PoE-powered switch with an Ethernet cable.
- Once powered on, our system will discover and provision the camera — this can take up to 15 minutes. When provisioning completes, the floodlight on the front of the camera will come on and stay on for the next 72 hours or until our team approves placement. This is intentional — it's the visual cue that the camera has been paired to your account.
Step 4: Schedule an Installation Window
- Contact [email protected] with your planned installation time.
-
During the scheduled time, Kingdom Metrics will remotely access the camera to:
- Review placement and viewing angle
- Confirm coverage of the auditorium
- Provide feedback if repositioning is needed
Reference Images
Need a hand?
Our team is happy to walk you through the install or schedule a remote placement review.
Email Support